Samstag, 31. Dezember 2011

Happy New Year

The last days have brought many changes to my tiny batcave. Me and my wife will move to a much larger cave very soon and we spent countless days with buying furniture and all kind of necessary and unnecessary stuff. We bought a showcase for my minis which is quite kick-ass, I will post pictures of it as soon as possible, but not before February.
Apart of that, I didn't get in touch with minis or mini-related stuff at all. To much other things to do, not enough time to relax. However, I expect a huge motivational boost in my own working/painting-room, what was the bat-kitchen until now. There are a few projects waiting to be finished and they have to be done until the Duke of Bavaria.
Sorry for not posting here on a regular basis at the moment!!!!!


Chris

Donnerstag, 15. Dezember 2011

The early bird catches the worm


It might be a bit early, but I would like to let you know that there is an official date for next years Duke of Bavaria in Ingolstadt. The show will take place from Friday (27th April) to Sunday (29th April).  As this has become the most important German painting competition and show, you should be there if possible. I will post pics of the last events during the next couple of weeks.


Chris

Mittwoch, 14. Dezember 2011

Quote of the day...


When I was in China on the All-American Ping Pong team, I just loved playing ping-pong with my Flexolite ping pong paddle.
                                             -Forrest Gump-


Montag, 12. Dezember 2011

Painters-reunion at its best


reunited (left to right: Erik with Akira, Goatman, Raffa, Angelus, me)

The last weekend was just great. I was looking forward to meet some ancient, some old and rather new friends at the same place. As we slowly tend to become elder (I saw an immense amount of grey hair around the painting table^^), this kind of meetings become more grown up, without loosing any kind of intensity or fun.
The "Casa Angelus" is an overwhelming place to hold such an event, the pure size of the house is breathtaking. In fact, I can hardly imagine a better place to meet friends. Sorry once again for the resin-thing, the cooking-thing, the jeans-thing, the hair-thing, the car-thing and the shower thing. The rest should have worked. :)

I want to thank Angelus for being such a great and strong-nerved host, to Raffa for sharing his view of life with me, to Goatman for being the ass he is (in the best way one can be an ass-I love you man!!!) and especially thanks to Erik for being the person he is. Special thanks goes to Akira for not licking my toes at night (don't even ask).

Here are some pictures to give you an impression of the event. Hope to see you guys again soon.

grumpy pirate-version of Raffa --- harrrrrrr


Angelus bending the steel-whire^^


true love


I painted this in about 90 minutes - contact Picster from massive voodoo if you like one of these


damn, we're getting old!!!

Akira the cat-killer

my latest victim of my purple phase


Chris

Donnerstag, 8. Dezember 2011

It usually takes a long time to find a shorter way

What happened during the last couple of weeks? One thing is sure, I did not paint for a second. First and foremost I decided to be Dovahkiin, I slayed Dragons, improved my Thu'um, retrieved long-lost spoons, intimidated kings and spoke to whispering doors. Furthermore, I smithed day and night, decided to not follow the path of Mara for the moment and instead restore the former power of the thieves guild. With a bag full of torchbug thorax and a totally useless torch I made my way through the world of pixels.......

I you have no idea what I am talking about, please don't even try to understand. It will absorb your mind, take your full attention and leave you as a lonesome creature of the night. I love it!!!!!!


However, I just wanted to tell you that there will be a great meeting of painting friends the upcoming weekend. Among the guys are Picster, Goatman, Archer, Angelus and Dovah.....^^
I will take some pics of the event and hope it returns me to my workspace. In about 2 months me and my wife will move to a much larger flat and I will get my own working-painting-fun-batcave. Yehaaa :)

I will show pics of the painters-meeting early next week. Here are some songs, pics and videos I enjoy at the moment, a wild mix around the globe.....


Chris

Dienstag, 25. Oktober 2011

Bonecrusher and Brain finished

After a long time, I finally finished this miniature and the base. I tried a lot of new things here, new colour (Vallejo Air), more texture, focus etc. I like the cartoonish style of the result, especially because many other people won't. I tried to limit the colour palette and still let the rat ogre look like candy. The flash exaggerates the colour by far, maybe there will be taken some better pics one day.
Brain, the real boss of this duo, was originally standing on top of a banner in the Island of Blood box. Hope you like what I did on this guys, let me know what you think. This mini will definitely go to the Duke of Bavaria and maybe to next years German GD, we will see......


Chris

Montag, 17. Oktober 2011

Bonecrusher update # 6

Not that much progress, nothing spectacular. The fist is almost finished, just have to set the tones right. Up next are the bandages on the other arm, then the cable and last but not least the tail. After that, fun begins...brain is already waiting for colour.....


Apart of that, I am making plans for upcoming events and contests. I love to do that, although most plans remain just that...plans. :)
As me and my wife cancelled our trip to the USA next year, I might take part at the German Games Day in October. The Duke of Bavaria is a must go as well. Apart of that, I would love to go to UK Games Day. Let's see which plans become real. ;)


Chris

Sonntag, 16. Oktober 2011

Games Day Italy 2011 - link colletion

This years last Games Day has just taken place and we already have the first results.
The Slayer Sword goes to:
Matteo Murelli


More infos I found:

rapaz one gold and one silver
rusto one bronze
franciuus gold in Large Scale and Gold in Diorama
gobbo one bronze
axia one bronze
Raffaele Picca Gold in 40k Monster and silver in 40k Single
mauganrà one silver
Andrea Ottolini 4 golds and one bronze
Angelo Di Chello one bronze
Steve gold in Open
Vincent (Althalus) bronze in 40k vehicle with a speeder

  Farabi:


Gold 40k monster (Picster - Raffaele Micca):


Silver 40k single (Picster - Raffaele Picca):


Chris

Dienstag, 11. Oktober 2011

Bonecrusher update # 5

I painted yesterday in the evening, so there is some progress to show. The mini is almost done, parts of the right arm, some bandage, the tail, cable AND "Brain" have to be done. I hope I can finish this mini until next weekend and send it to the box of pride (aka my showcase). You want to know who or what "Brain" is? You'll have to wait a few more days.
The picture shows that there are still some lights missing on the arm, I will change that soon. Concerning the warpstone - I was really afraid that the green would ruin the entire colour balance of the mini. I decided to do large parts in very light green/ greenish white, to prevent that. The result is not fully convincing, as it doesn't really look like some sort of gem. I think I will add some dark spots for more contrast and hope that will do it.
Can't wait to finish this project, do "Brain" and head on to the next miniature.


Chris

Montag, 10. Oktober 2011

Review: Citadel Liquid Green Stuff


This is what GW says about one of its latest products:
Liquid Green Stuff is the ideal tool for filling in small gaps on a miniature. Because it is water soluble you can use a normal Citadel Paint Brush to apply it (just make sure you wash the brush afterwards). The Liquid Green Stuff will then set in place, filling the gap neatly and efficiently.
This pot contains 12ml of Citadel Liquid Green Stuff


First thing that came to my mind when I saw "Liquid Green Stuff" was: "Yeah, right. So this is your answer for Finecast." However, I gave this a try and decided to do a little review.
I have read several articles about this stuff and some of them said that Liquid Green Stuff is non-toxic. GW doesn't say that on their homepage, so this might be wrong. Can't tell you more about this aspect but I try not to lick the brush after using it. :)

Consistency:
Liquid Green Stuff looks and feels like almost dry GW-colour. The one that is not totally lost and can be reactivated by adding a bit of water. You could also compare it to liquid rubber or hot cheese on a pizza, whatever you prefer. When you look very close, you can see sort of a sandy surface but that disappears after drying. There is a very faint smell that I can't describe in detail, but nothing to worry about. As I mentioned before, I didn't taste it.

Shrinking:
I added a small strip to a ruler, exactly 1 cm. I then waited for about 15 minutes and looked again, without noticing any shrinking concerning the breadth. What I instantly noticed was the fact, that the Liquid Green Stuff became very flat. So as the original GW-text says, this seems quite good to fill gaps, bubbles or remove mold lines. As this was a very quick test, I wouldn't definitely say that it doesn't shrink at all, it just didn't until now (one hour went by).


Filling gaps:
I looked for something with a visible gap and found nothing.^^ Then I went reeeaaaalllyyy deep into my box of shameand found the legs of the Nurgle-Lord-thingy from 40k. As you can see on the pics, some work has to be done between the leg and the torso. Lets see how it worked.


I was a bit disappointed at this stage. I waited for about 15 minutes, until the Liquid Green Stuff looked totally dry. Well, it was not. I have to test how long it really takes until it is dry and can be sanded, 15 minuted are not enough. However, this is the result. The gap is filled, thats what I wanted. The consistency at this stage is still like rubber.


Smoothen flat surfaces:
For me, this is the real strength of Liquid Green Stuff. I used a lot of other puttys to get surfaces smooth but none of them worked perfectly for me. This product does.


First a I added a bit of water to the surface, then I applied a first thin layer of the putty. After 5 minutes, I applied a second layer and waited. Using water really makes this stuff easier to work with, I have to try different mixtures to get a satisfying result. After about 20 minutes I sanded the surface and got a really smooth result. The best thing is, you don't have to wait ages until the putty is dry.


Using it to sculpt:
No way, don't even try it.


Conclusion:
Liquid Green Stuff is worth the money, especially compared to other puttys used for the same reason. Don't use it right from the pot, it will disappoint you. Dilluting with water brings nice results. After drying, it doesn't get rock-hard.


If you have any questions or remarks, let me know.


Chris

Sonntag, 9. Oktober 2011

Bonecrusher update # 4

I really feel bad because I had no time to care for this blog during the last couple of weeks. However, after I found some routine concerning my job, I managed to also find some time to paint again. With about 10 different wips in my "box of shame", it seemed to be a hard decision to chose the right mini. It wasn't....

I am really motivated to finally finish the Bonecrusher-project and send it to my showcase until the next GD. Therefore I rushed some unfinished parts yesterday in the evening. I painted the neck muscles, the face and the metals on the weapon arm in about 4 hours. The pics are terrible as always, to yellow and a bit blurry. Let me know what you think...


Chris

Mittwoch, 5. Oktober 2011

You shouldn't miss...

...some great step by step articles. All painters are Germans and rather new to the topic of historical painting. While SKATE shows some awesome freehand work with a little help from masking tape and his airbrush on Pegasos Karl D'Anjou, Feanor uses pure brushpower to paint Markos Botsaris from Alexander Miniatures. Crackpot is doing the "usual" stuff - pure perfectness. Follow the links and enjoy the pics. Unfortunately the descriptions are written in German only, but maybe the pics help as well.


I myself haven't held a brush in my hands for weeks now, but this will change today. I will take some pics and show you my current project soon. My brain is full of ideas for both fantasy and historical projects.


Chris

Sonntag, 18. September 2011

Euro Militaire Folkestone 2011 link collection

Here is a collection of all links I could find on the internet concerning the Euromilitaire in Folkestone this year. I will update this topic as soon as I find new links. Enjoy


to be continued....


Chris


Samstag, 17. September 2011

No news is good news???

I love my job. School started here in Bavaria and I have been removed to a new place. New school, new pupils, new rules and above all new impressions. Did I mention that I love my job? I can hardly imagine something more satisfying than helping people and seeing progress on a daily basis. Miniatures are as far away as the moon is for me at the moment, as there is a lot of work to be done. A strange, but not necessarily a bad feeling...
Here is some music I like to listen to after a long day at work, hope you like it.


Chris

Freitag, 2. September 2011

The Outlaw

As I told you a couple of days ago, I managed to finish my little version of Robin Hood. The whole scene, especially the colour scheme where inspired by the classic movies rather then by the current, darker versions of this character. The base was pure fun to do, the leaves are glued one by one. I can hardly imagine something more relaxing at the moment....
Thanks once again to Raffa (Picster) for taking the pics.


Chris

Donnerstag, 1. September 2011

Step by step tutorial: 33rd Regiment in Abyssinia

As this miniature is now finished, I thought it might be a good idea to sum up the different wip posts and make one single article out of it. This way you can easily reconstruct the whole process without clicking too much. Raffa kindly took picture of the finished miniature , which you can find at the bottom of this post. Thanks a lot for that mate, extra banana promised!!! I also added a bit more theory to some parts, enjoy and let me know what you think.


Choosing the base, preparing the miniature

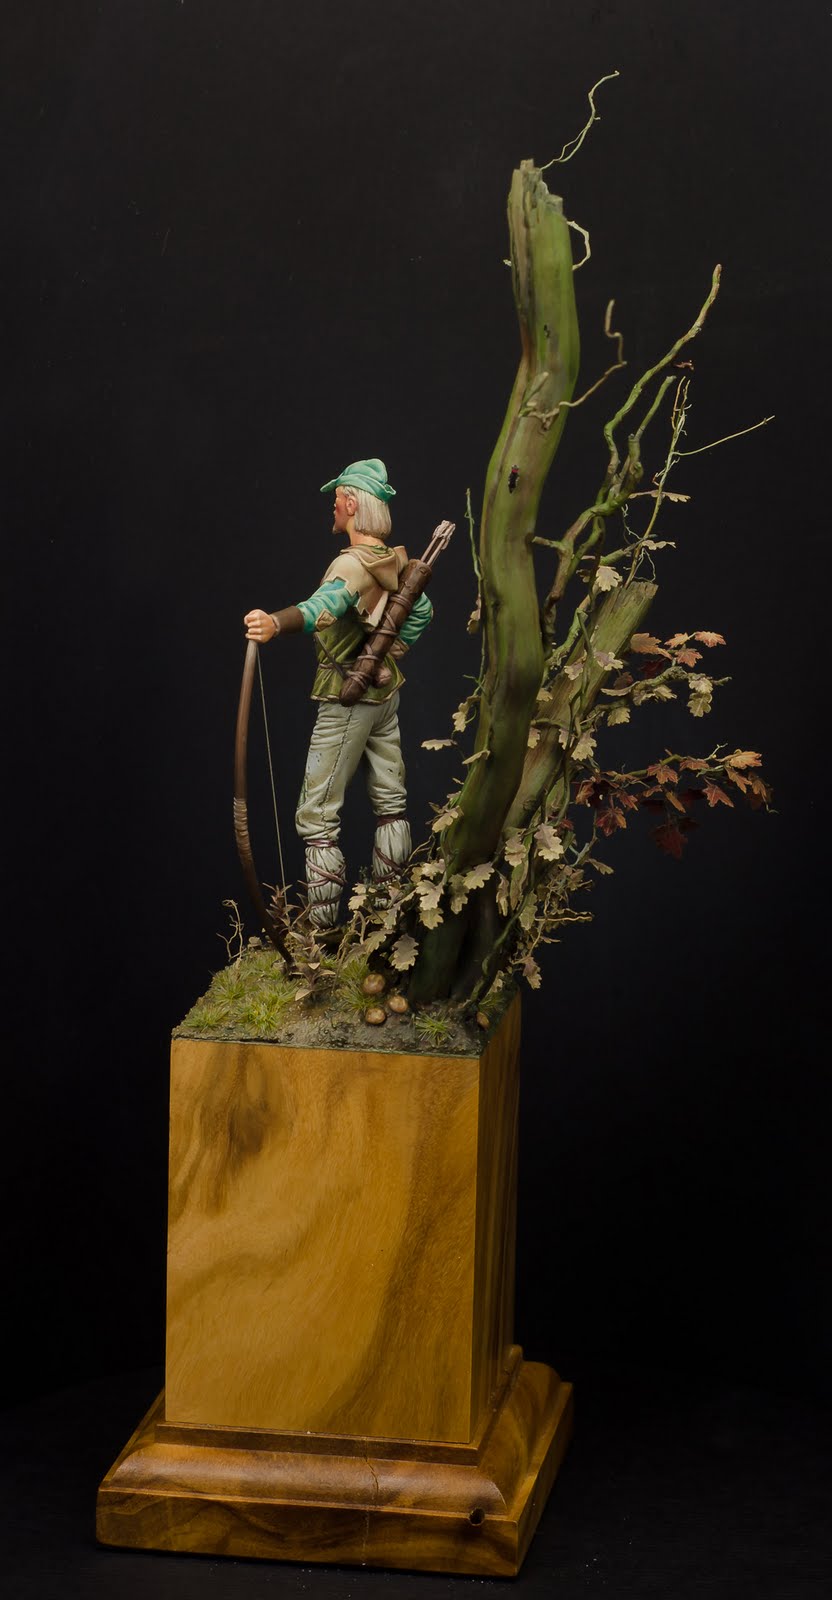
Usually I begin with the base of the miniature, just because it is more fun and you see process very quickly. With this miniature, I will not do so. The reason for that is because it will be a very simple base, more or less just sand and a few rocks and a bit of dry grass.
However, there are a few important things I would like to say about the right wooden base:

Height: usually, the base should NOT be higher than the miniature, nore should it be much smaller. Both effects will usually have a negative influence in the overall impression. The picture below shows, that the miniature and the base have about the same size.


Top: The top of the base should be about 2/3 the miniatures size, when you don't plan any walls, buildings, trees or whatsoever. Very often I see well painted miniatures on way to huge wooden bases. That way, the miniature seems lost, small and out of focus. That is bad....


Colour of the base: For years I only used bases that I sprayed black. That way, all of the focus went on the scenery and miniature on top of the base. Today, I try to use bases, that have a similar colour as the ground (not necessarily the miniature). By using similar colours for wooden base and scenery, you don't see a strict border between base and the rest. The final result of this miniature shows that the colour of the wooden base, the painted ground colour and some areas on the miniature itself are the same. That is good...


Preparing the miniature

I removed all moldlines yesterday (edit: at least I thought so^^) and filled some gaps on the shoulders and the neck with green stuff. This morning, I drilled holes into the legs and pinned them. This way I can attach the mini onto a painting base in the right position. I always drill the holes into the heel and up the leg. Otherwise, there would be very little space for the drill and I would ruin the shoes.


Painting the face


Painting the face (theory): For me, the face of a miniature somehow determines the feeling, the ambiance and the sympathy. Although the face is very small, I think it catches about 50% of the viewers attention, the rest is bonus (what does not mean that you should rush there). A well painted face show good blending skills AND hard lights at the same time. You need very strong lights and shadows on a rather small surface to achieve something that seems individual, that gives the miniature its face. Most important is the T-zone, what I will now explain in detail.
Imagine a "T" right in the middle of the face of your miniature. The horizontal line are the eyebrows, the vertical line is the nose down to the chin. This "T" shows the lightest areas in the face. In addition to that, you have the nasolabial folds, which are very light as well and determine the harshness of the miniature. This "T" and the nasolabial folds are surrounded by the darkest areas in the face. The area under the eyebrows, running down the side of the nose und the point under the lip but above the chin are really, REALLY dark. By putting this contrasts together, you get a well painted face.

Colour choice: Everyone has his own recipe for painting skin, I use Tanned Flesh, Bronzed Flesh, Elf Flesh und Skull White for the basic blending and lights. Shadows and nuances are set with every colour  I like, green, purple, red, blue, grey.....


Basic colours, codex grey for the beard


Base colour is Tanned Flesh + Bronzed Flesh (3:1) - the face is primed quite rough


First lights by adding more Bronzed Flesh, you can hardly see any difference


More Bronzed Flesh has been added, you start to see the "T"-line


Elf Flesh has been added to the mix, the lights are now very clear and you just follow the path


The lights are very strong now, to strong in fact. Don't care about that, you can change that later.


The lights are finished, the miniature looks more like a ghost at this stage.


This is quite a huge step in one picture, I glazed the face several times with
the base tone. Then I painted the beard with a mix of Tanned Flesh and
Codex Grey (3:1). Then I painted red under the cheeks, green onto the temple
and several mixtures to darken the area next to the "T"-line.

 
Note that the face still looks rather strange and unfinished. This is because the moustache und the hair is not painted yet. I didn't paint the neck because I will now mask the face and do some airbrush work. Painting the face without any reference colour around can be difficult when you just begin with the hobby. Most often the contrast will seem way exaggerated and just not right. This will change as soon as the surrounding areas also get some colour. No need to panic at this point....


Finished face

Here are some pictures of the finished face, you can see what I just mentioned above. The hair takes some attention away from the face, the colours work together and the contrast seems less strong.


The colours, lights and shadows strongly influence your further process with your miniature. There should be no area that is lighter than the lightest point in the face. That would draw the attention to the wrong place (exception: for some reason, you want the focus to be somewhere else).


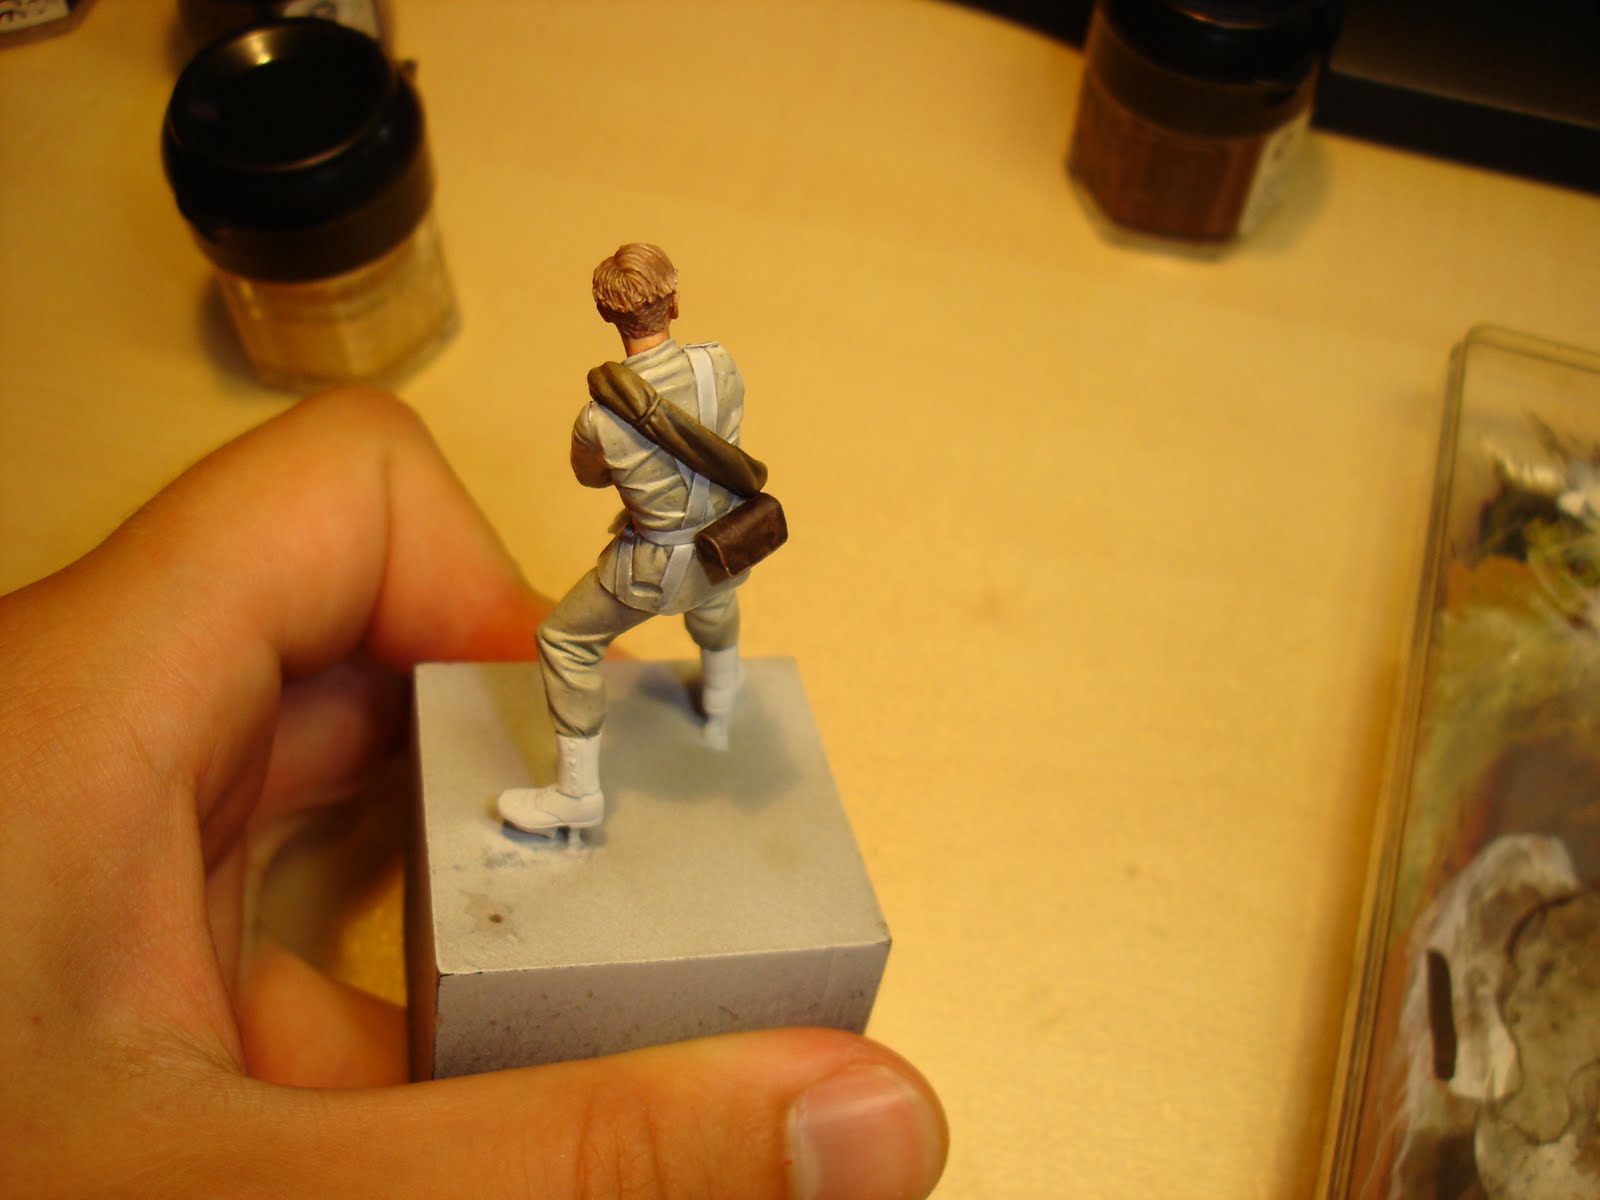
Using airbrush on the uniform

 I used Tamya masking tape to protect the face, boots and the free hand from the colour that will be sprayed onto the miniature. The Basecoat is a mix of Vallejo Dark Sea Grey, Vallejo Model Air Gray Primer and Vallejo Model Air Skin Tone (10-1-3). After two layers of basecoat I added a bit more Skin Tone to the mix and sprayer the first lights. I then added more Skin Tone and repeated this step. The nuances on the uniform are very narrow, there is still a lot of work to be done with the brush.


Painting the uniform

The colour of the uniform refers to Osprey Men at Arms # 198, The British Army on Campaign 1856-1881 (page 29 ~ soldier on the left). This link gives some rough information about the regiment the miniature refers to, here you can read about the British activities in Abyssinia. When you intend to paint a historical miniature, make sure to do some good research on the equipment and uniform of the miniature. When you mess up the correct colour, like I did on this one, you can at least tell that you know you mistake before someone else tells you about it.^^


For further lights I used more Vallejo Air Skin Tone, what proved to be a mistake. The result is a Khaki uniform, instead of a light grey one. I painted several glazes of grey onto the mini but it didn't change the colour that much. Then I decided to either rescue or ruin the mini and mixed some Codex Grey with Chaos Black. This quite dark colour was painted onto all surfaces which were meant to be in the shadow. The result is not breathtaking, but it is ok for me. I then noticed, that the uniform looks very new and unworn, so I painted a lot of dirt by just tipping the brush with thinned down colour on the miniature. Unfortunately, the last pictures don't really show this effect.
The uniform still looks a bit too monotounos for me, so I will paint a few shadows using greens and brown, we will see what happens.


First lights have been added by using more Vallejo Air Skin Tone. After this
Mix, I should have used Bleached Bone....


Soft folds get blendings, hard folds get NO blending, very important...


Current state of the miniature, the focus is quite clear.


I just noticed that is might make sense to write an article about different kinds of cloth and the best way to paint them. There was a time when each and every fold on cloth I found became its own blending, what is absolutely not necessary and rather unrealistic.


Going into detail

The remaining things are fun, small details in different colours, nothing repetitive. I painted a rough surface onto the brown cloth, unfortunately the picture hides most of that. The contrast isn't that hard in real. I will add more nuances to the uniform when all details are finished to get the right colours.


Just a bottle

A really small update, the water bottle is finished. There are two hours left for painting, then I have to leave.


A worn bag

I took a wip shot during the painting of the worn leather but it turned out quite bad. This is the way I painted it:

> Ground Colour is a mix of Scorched Brown, Bronzed Flesh and Vallejo Air Golden Brown (10-1-2). I painted several thin layers of this colour onto the bag.

> I added more Golden Brown to the mix and took a "larger" brush (Da Vinci Nova Synthetics Size 0). I dipped the tip of the brush into the paint and removed most of the colour on a tissue. Note that the tip must not end in one point, an older brush does a very good service here. I then started dipping the almost dry brush onto the bag, trying to let the pattern look random.

> I repeated this step two times, once by adding more Golden Brown and once by adding a bit of Bleached Bone. The contrast must be very strong at this point.

> Then I used "Badab Black", one of Citadels new washes and thinned it down a lot. After about 5 to 7 layers, you start seeing how the colours run together, the contrast isn't that strong any longer.

> The last step is to take some undilluted wash and dip it on the bag, leaving really dark spots. This is it.
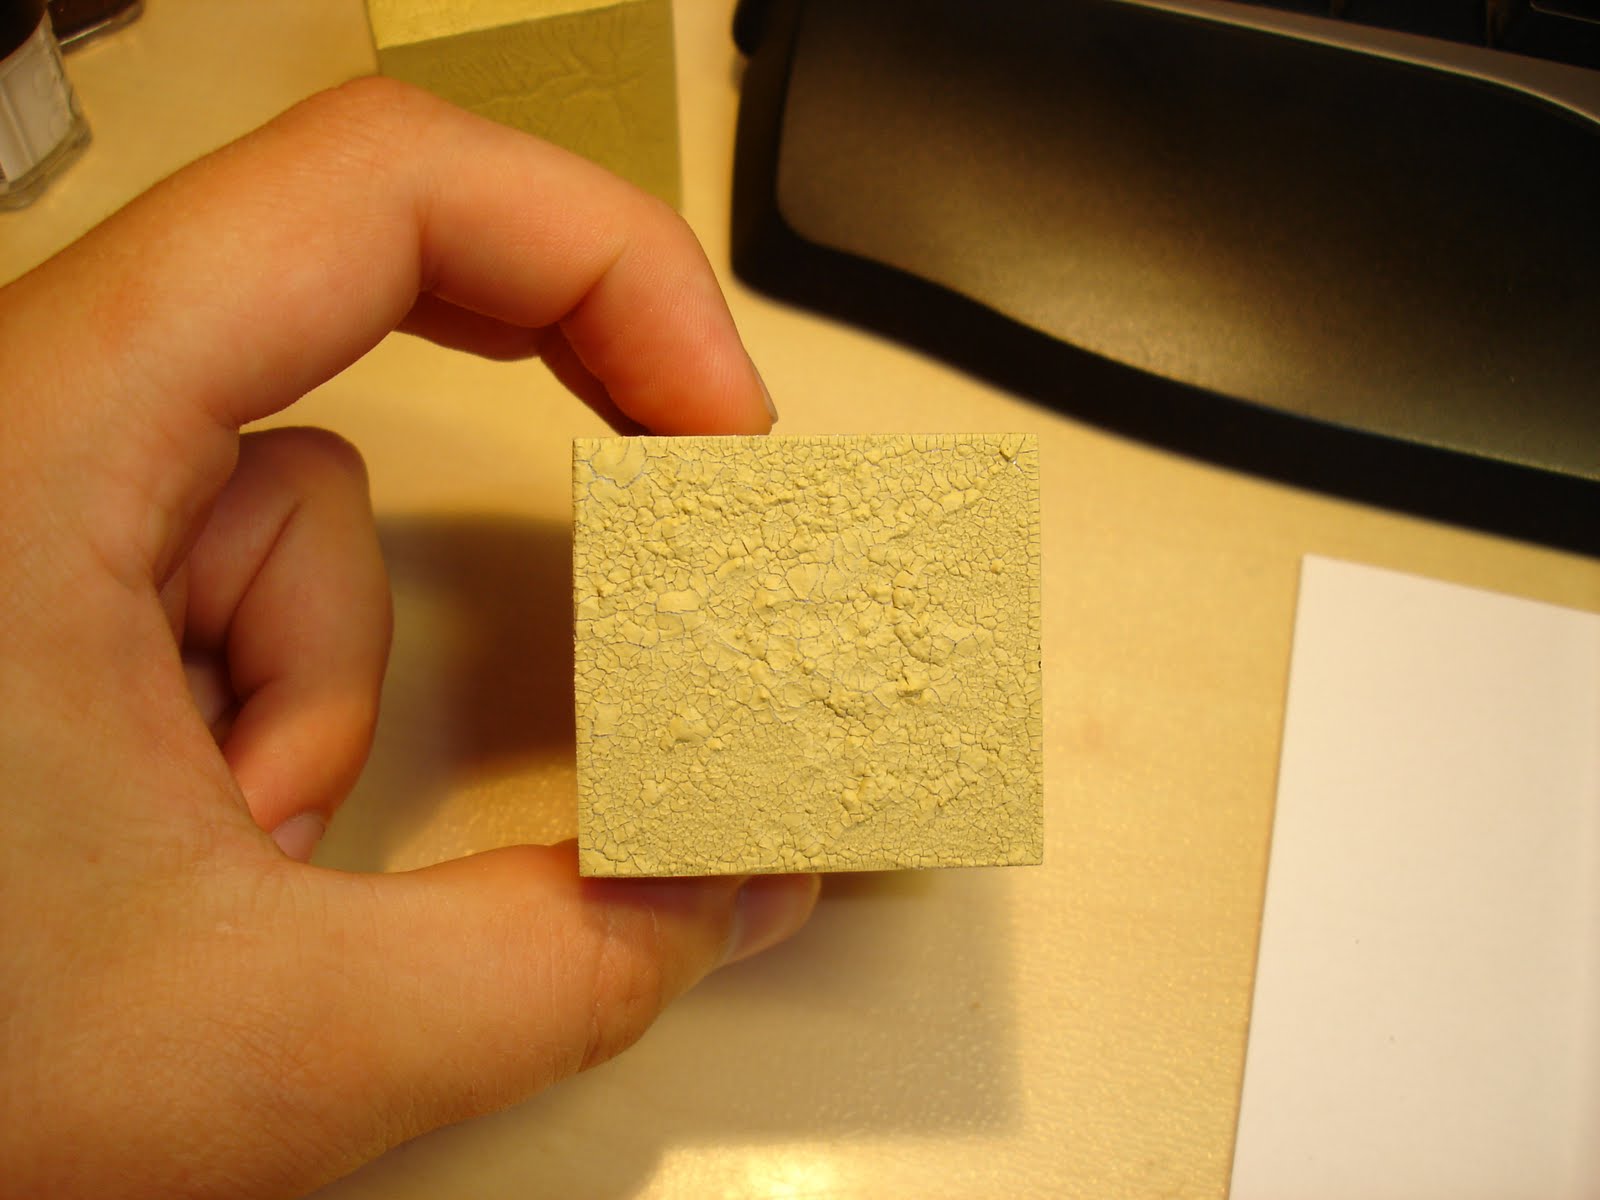


Drought soil

Yesterday in the evening I still thought about the base and decided to do some sort of dry soil, maybe a riverbed. As I ordered Distress Crackle Paint some weeks ago, I finally wanted to try it. As I never worked with it before, I had to try different sorts of drying, applying and thinning. That took me about 3 hours this morning, so I didn't paint anything on the miniature itself. However, I managed to create a base that seems ok for me. I will add some dry wood and the soldiers gun and that is it. Very simple but not just sand....

Here is the wip, I forgot to take a picture of the Distress Crackle Paint that was put on the base after the Vallejo Sanding Paste had dried. Sorry for that...


I carefully chose the front side of the base.


I use this quite often, a great product from Vallejo.


Using a toothpick saves your brush from dying an uncomfortable death.


This takes about 15 minutes to dry. Coffee time...


After the sanding paste was dry, I put a thin layer of crackle paint on top
and threw the base into the oven at 50 for 3 minutes.


The result, I am satisfied with this.


The rough paintjob is done, now I have to go into detail.

We need a medic over here

I painted some blood, Vallejo Air Fire Red mixed With Vallejo Air Black (5:1) plus some Glaze Medium. Not that bright red irl.


And here are the pictures of the finished miniature. As the Glaze Medium didn't work, I used Gloss Varnish as a topcoat for the bloody areas. Furthermore I painted the soldiers shadow onto the ground, I will do an extra article about that soon.


Thanks for reading, hope you enjoyed this article. If you have any improvement suggestions, please let me know.


Chris